

Garage Turned Tv Room Decorating Ideas
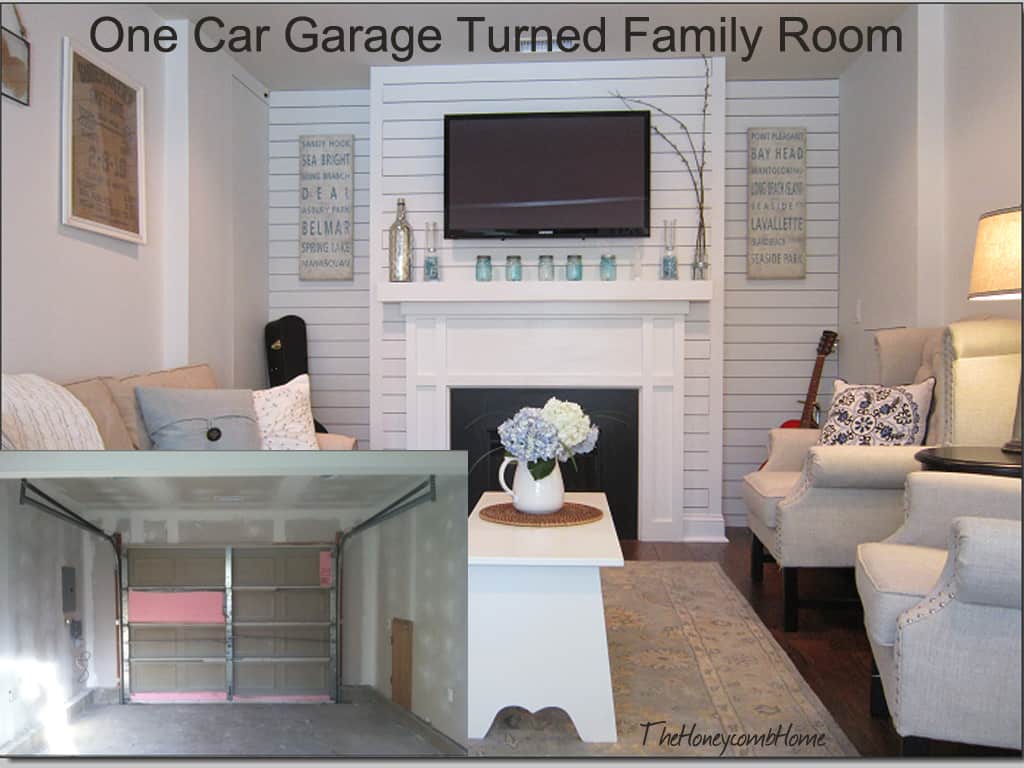
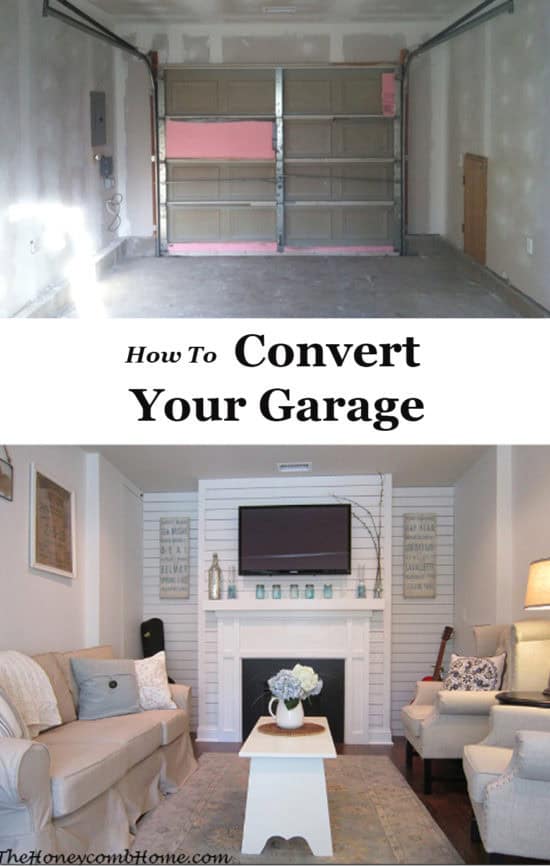
Today I am excited to reveal our converted garage. We turned our 1-car garage into a family room. This room is really still a work in progress but I can't wait to share it any longer. We live in a small, 1200 sq.- ft house. The downstairs consists of just an eat-in kitchen, an average size living room, and an attached one car garage. We debated many years on whether to sacrifice the garage in order to expand our living space. By debated, I mean I kept telling my husband, John, that we should and he kept saying no. Ten years later, I finally wore him down.
I would say from start to finish this project took us about 2 years or more. We worked on it as time/budget allowed. I will break the process down in steps.
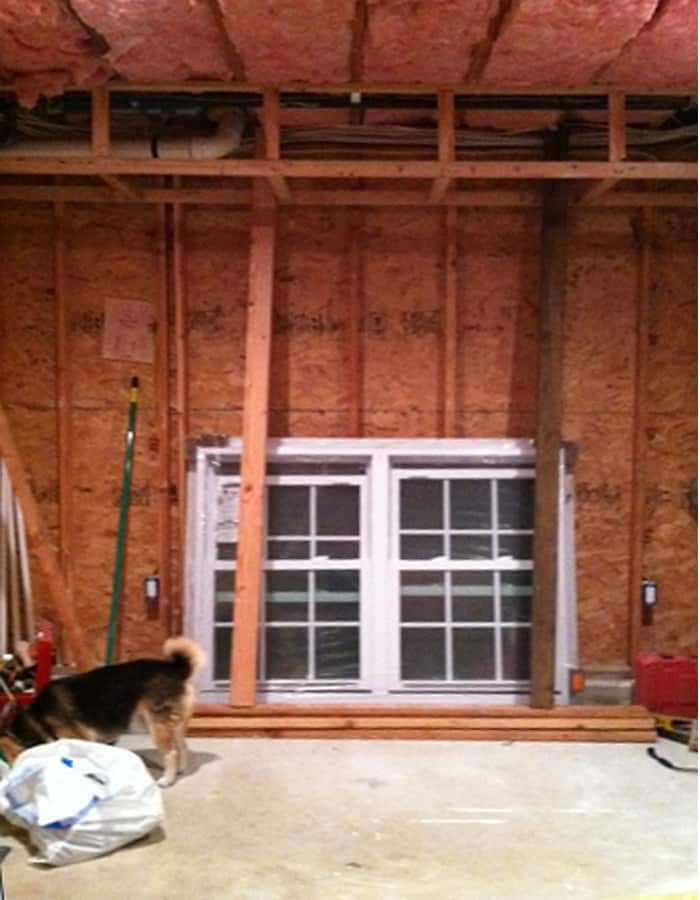
1. Add a window.
The first thing we did was add a double window to the south wall. Johns cousin, Robert, who happens to be an amazing carpenter by trade, installed this for us. We purchased the window at Home Depot, and it cost around $400. This is a picture of the room in progress, we had the window but hadn't installed it yet.
2. Add heating vents.
Our furnace and hot water heater happen to be in the room next to the garage so we just tapped into that and ran the venting from there. The room really doesn't warm up like the rest of the house but with the electric fireplace on it gets very comfortable.
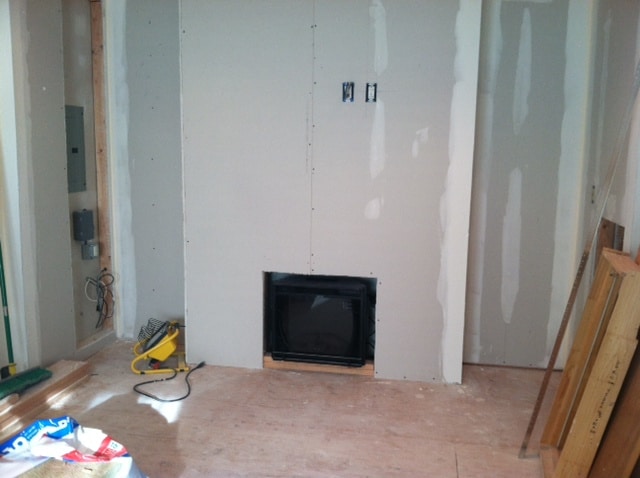
3. Sheet rock, insulate, add outlets.
Next John had to re-sheet rock and add insulation. Johns brother, Paul, helped out a lot with this. This was probably the most time-consuming and messy part.
4. Add lighting.
John, Paul and Ringo Robert added recessed lights above.
5. Build up sub floor, install flooring.
Before we could lay our flooring, we had to build up the floor with a sub floor to make it level. Once Robert built it up, John and Paul laid our wood floor. The floor is laminate, by Hampton Bay* and we bought it at Home Depot. It was on sale for only $.99 a square foot! I am so happy with these floors.
6. Add wall over existing garage door.
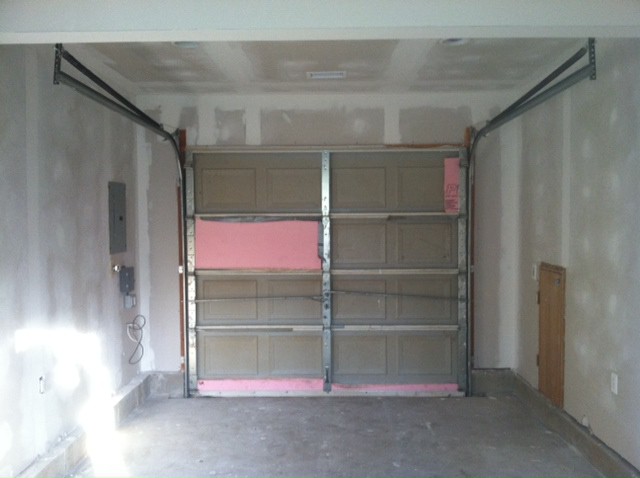
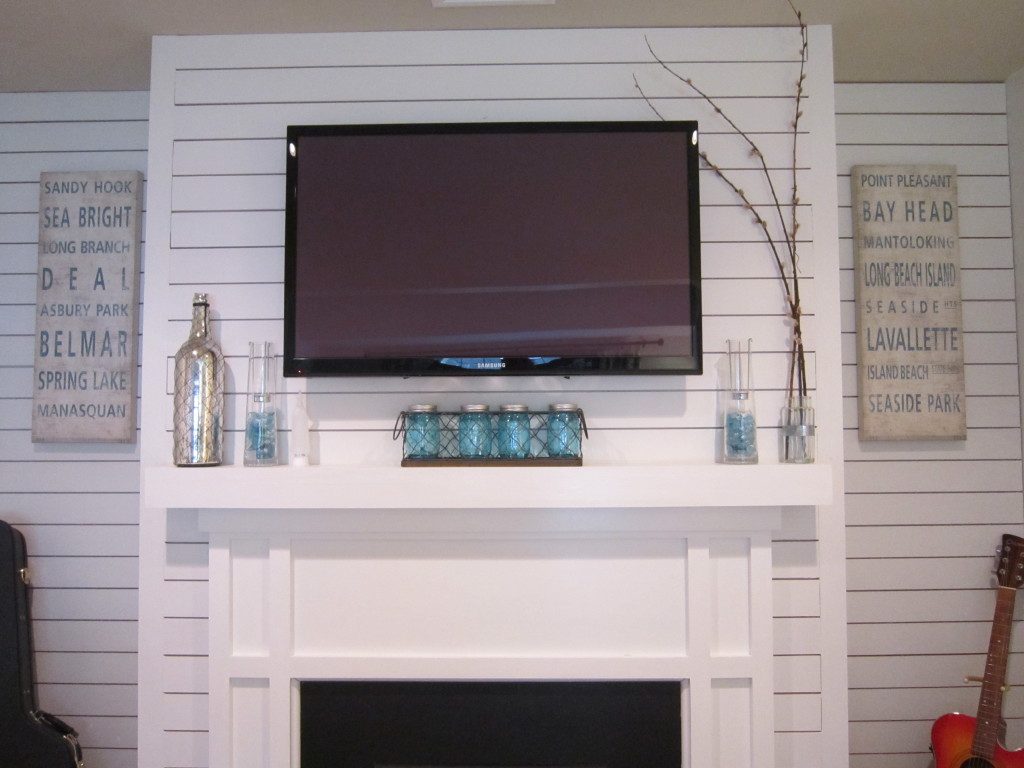
Robert covered the wall where the garage door is by building it out. I had a clear vision of what I wanted this to look like in the end. I showed Robert many inspiration pictures I had saved. I knew I wanted the center bumped out to add a fireplace, really making that the focal point. We purchased the electric fireplace and TV around this time so we could make them a custom fit in the bump out area. John added the outlets for the fireplace and the TV we planned to hang above.

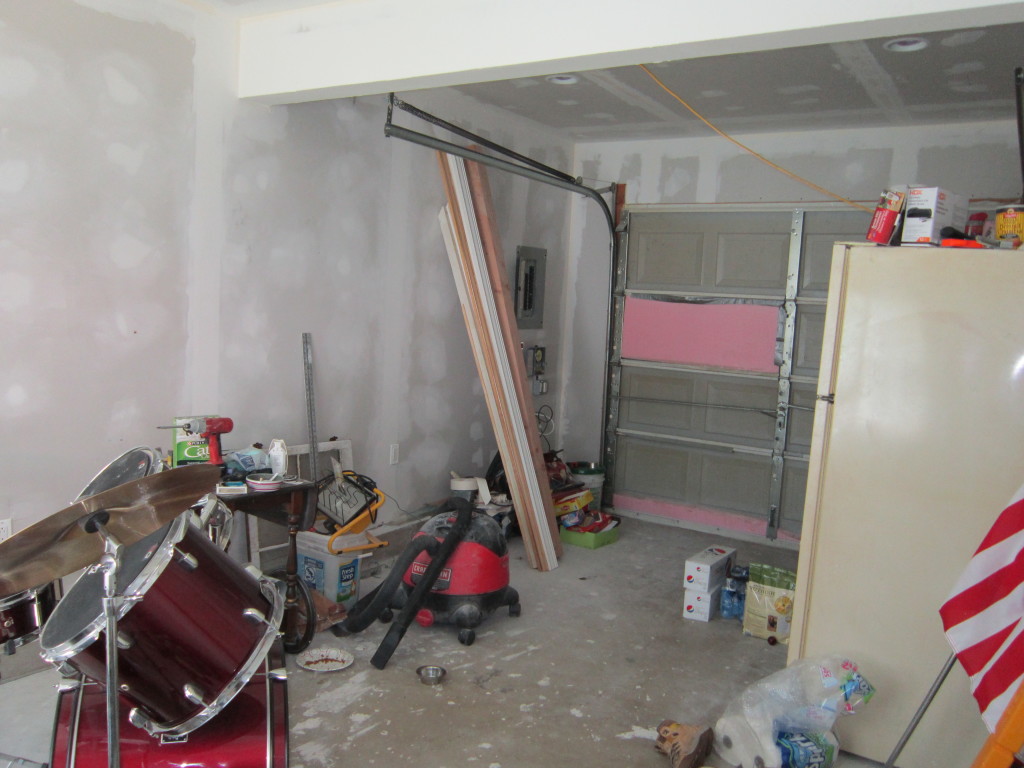
We did have some problem areas to deal with. We had an exposed electrical box on the left wall and a weird little door on the right wall, as you can see in the above photos. We obviously would still need to access these so Robert came up with a plan. He bumped out each of these areas and added flush doors that we just press on to open.
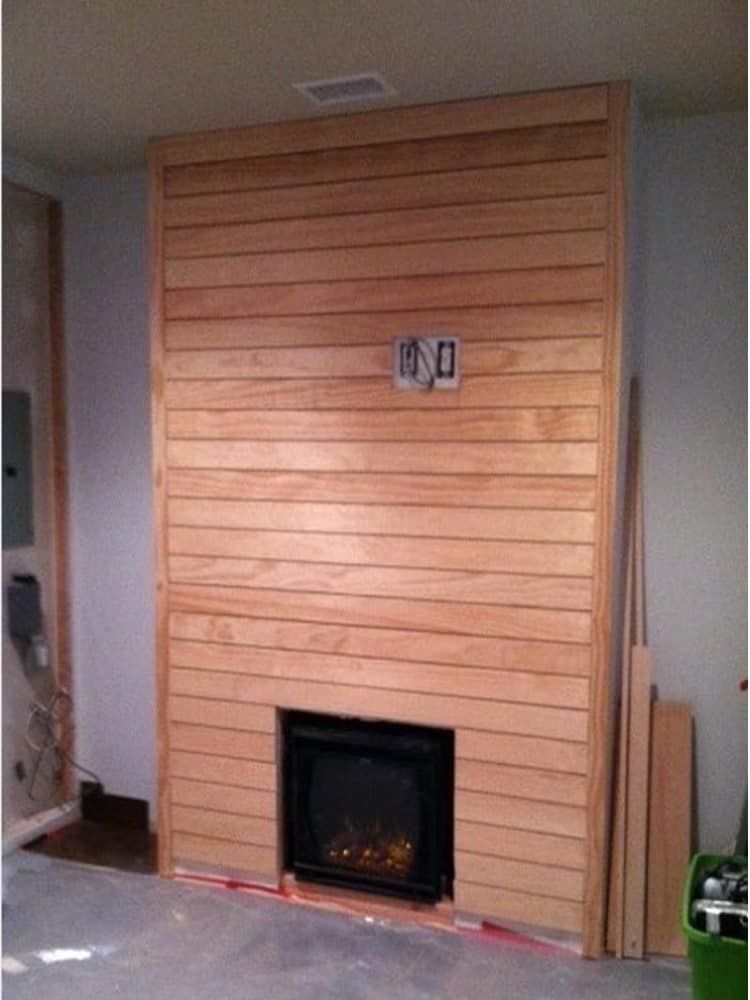
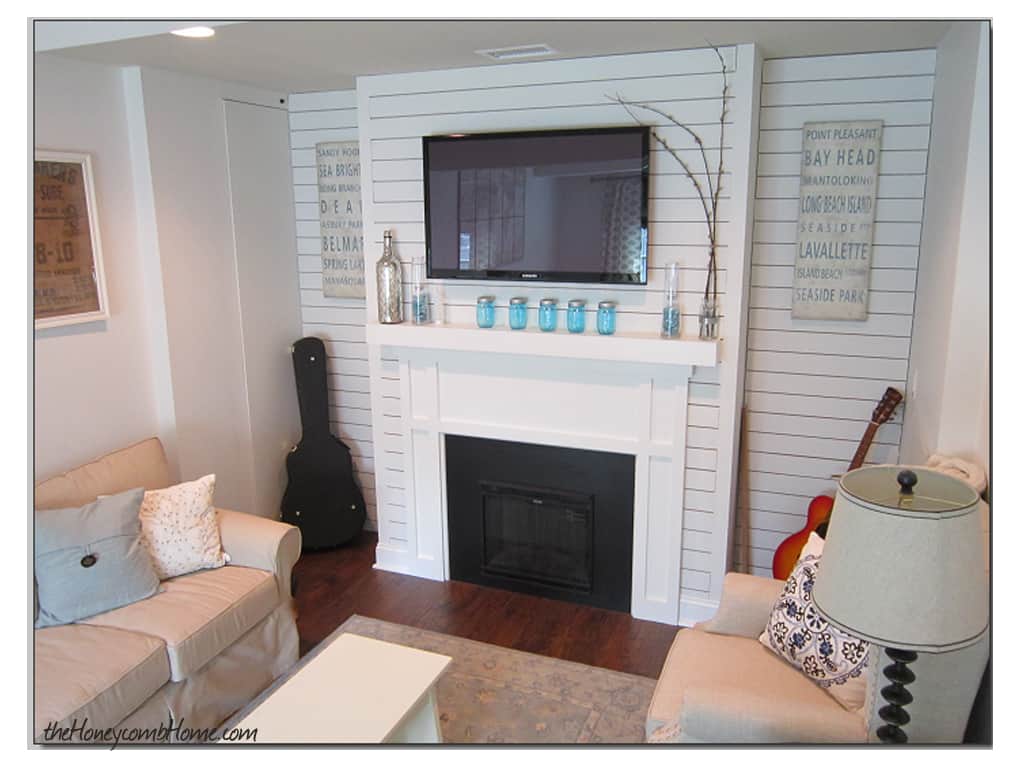
7. Added planks (shiplap) for architectural interest.
Once Robert built the wall, John added planks using 1 X 4's for architectural interest. This is another project I've always wanted John to do. It turned out to be pretty simple for him. He finished this project easily in a day. You can read how to install shiplap here.
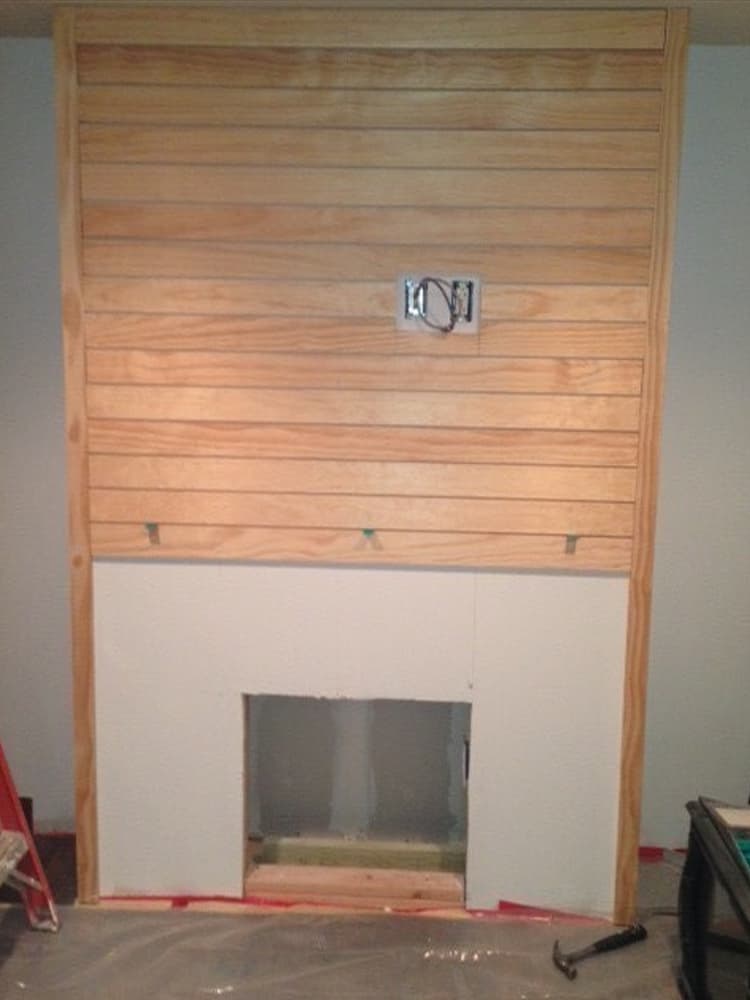
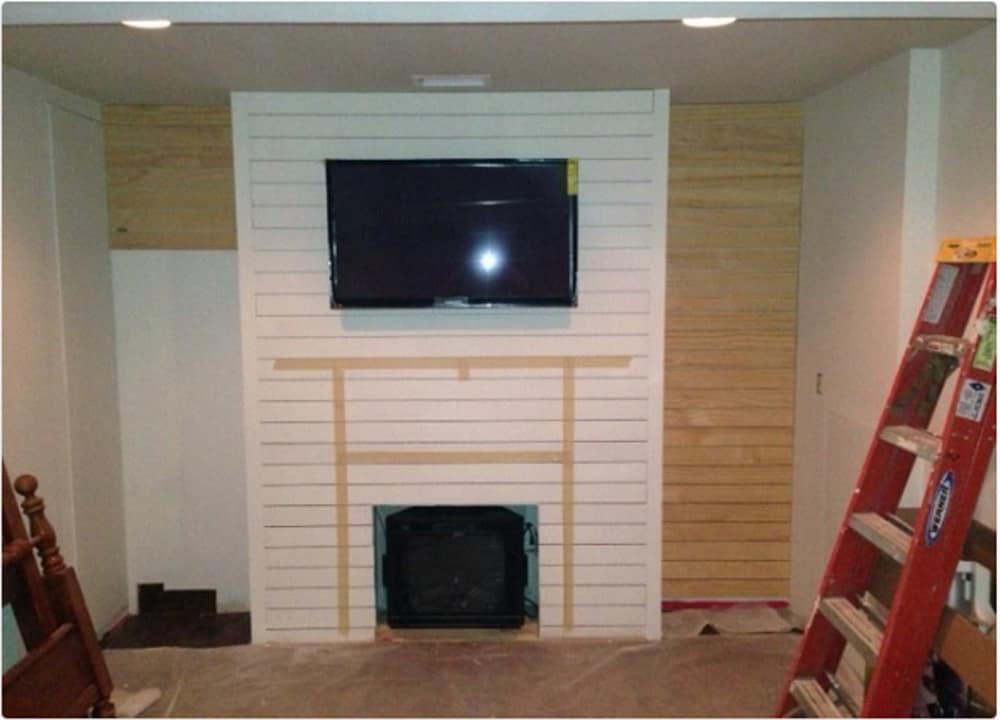
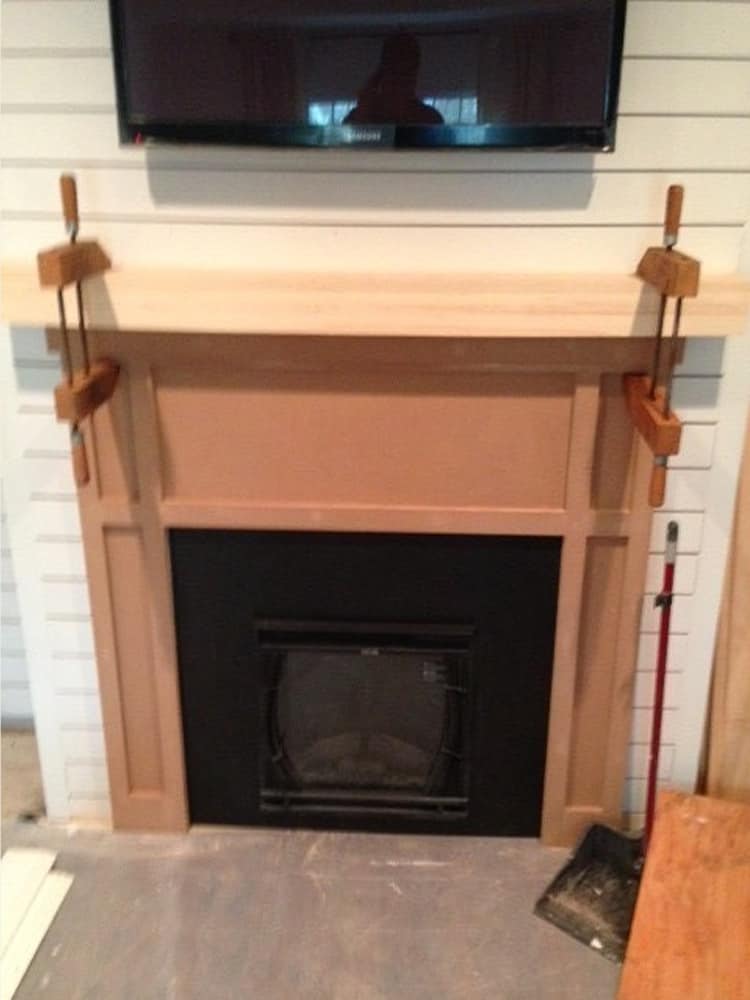
8. Added a mantle.
Once the planks were up Robert constructed our mantel. He made the mantel at his house & brought it over to install.
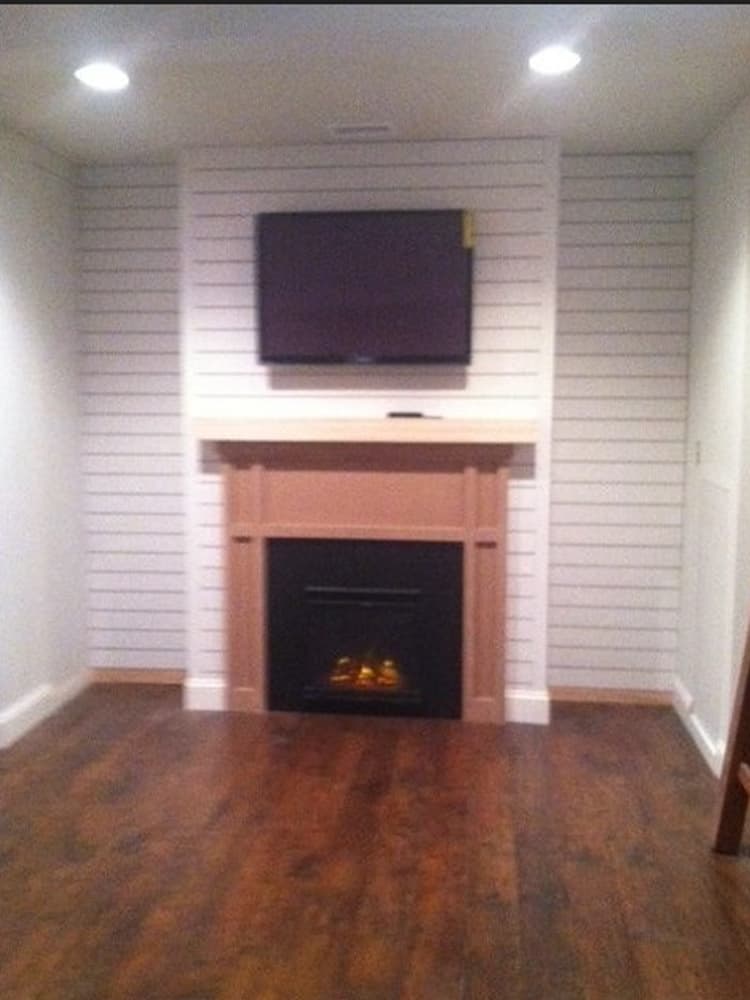
We eventually plan to add shelves on either side of the fireplace, in the recessed areas. Sorry, these pictures are so fuzzy but I snapped these in my pre-blogging days.
Before
After

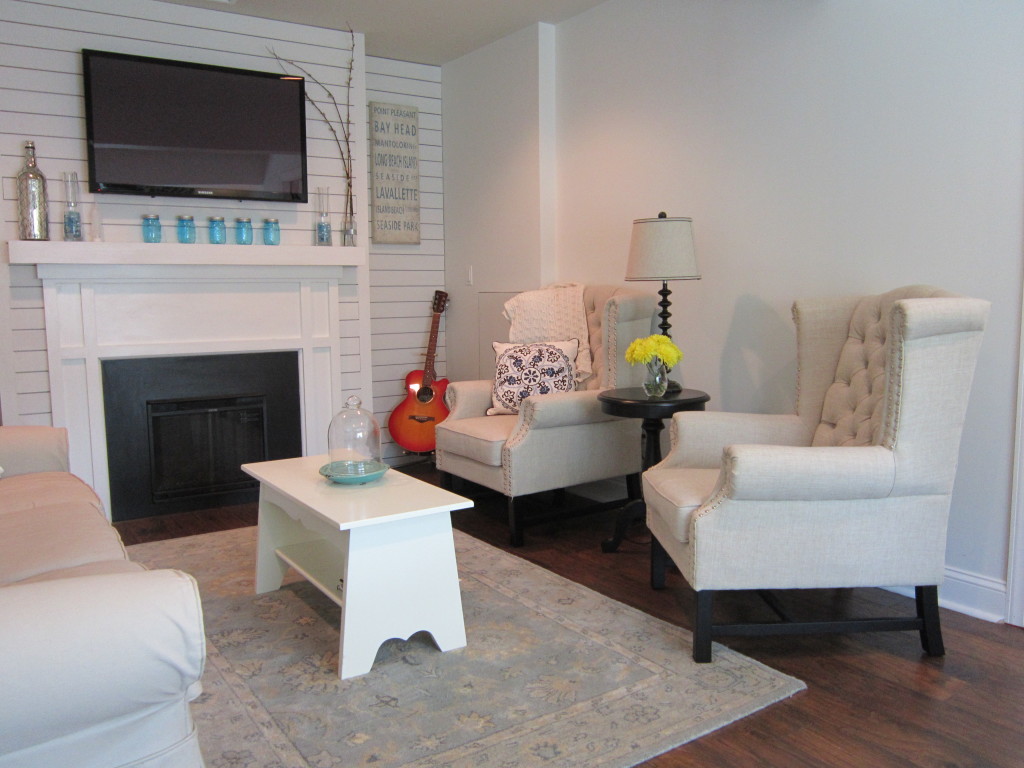
The walls in the picture above are still bare, I haven't found anything I love to put there yet. The coffee table/bench is pulled from my daughter's room for now until I find something better. The chairs above are from Wayfair and I highly recommend them. The sofa (fabric color is parchment) and rug are from Pottery Barn.
The pictures on either side of the TV are from Bed, Bath and Beyond. I was originally planning on putting mirrors there to reflect the light from the windows on the opposite wall but when I saw these I knew they were perfect. Not only in color, but they list all the Jersey Shore beach towns that we've grown up around.
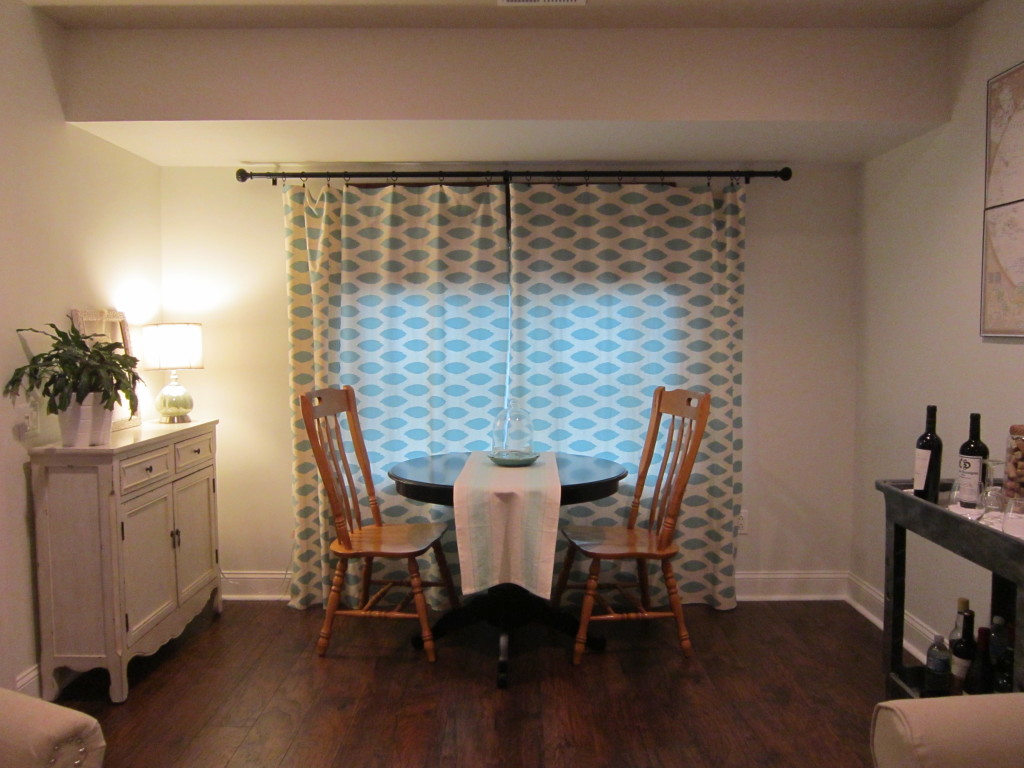
The chairs shown above are just pulled from my kitchen for now. I have plans to update those. I am thinking about something like these from Arhaus, with a rustic coffee table to tie them in.
I also plan on adding something in the corner to the right of the table, possibly a floor lamp or a tall plant, very undecided on that as of now.

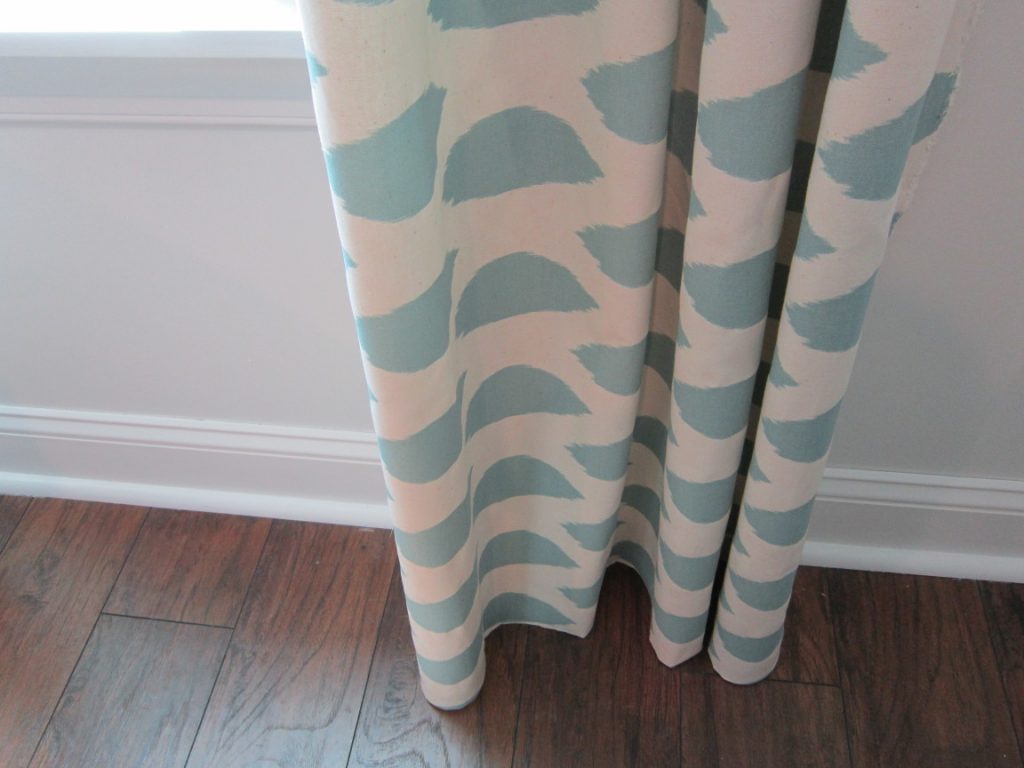
I made the no-sew curtains myself, the fabric is from onlinefabricstore.net. The cabinet on the left is from Joss and Main. The bar cart to the right is actually my husband's old tool cart that had always been in the garage, so I repurposed it for a bar cart.
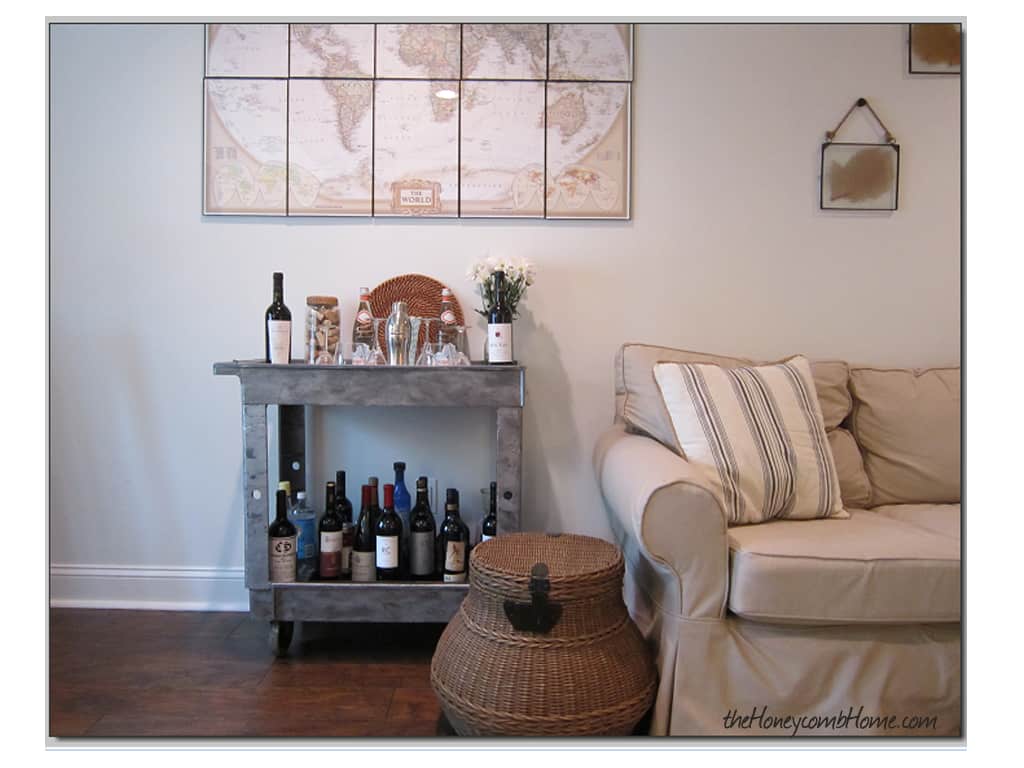
The world map above the cart, I bought on eBay for $20 and framed it using inexpensive frames from Wal-Mart. The basket next to the sofa is from Pottery Barn.
Here are some more before and after photos so you can see how far we've come with this project.
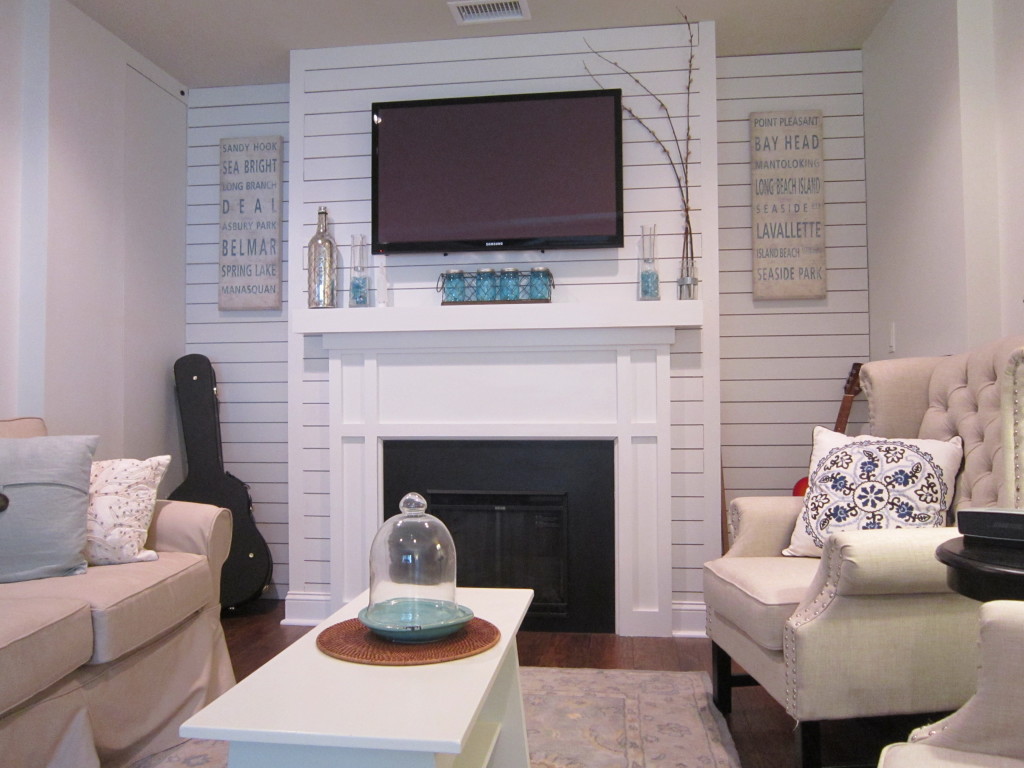
The walls are painted White Dove, the trim & the mantel are Bright White and the ceiling is Manchester Tan, all Benjamin Moore.
Now that the room is done, John is really happy we did it. We made some sacrifices, such as giving up that space for storage, we sold our treadmill that we no longer have room for, and got rid of our second refrigerator. But the added square feet of living space is well worth it.
What do you think? Is a converted garage worth giving up storage space for more living space? Leave a comment and let me know.
You can see updated photos of this space here.
*This post may contain affiliate links, read my full disclosure here.
Garage Turned Tv Room Decorating Ideas
Source: https://thehoneycombhome.com/1-car-garage-turned-family-room/
Posted by: schoonoverwidep2001.blogspot.com
0 Response to "Garage Turned Tv Room Decorating Ideas"
Post a Comment